
Setting up your Tranche 2 compliance flow
Overview. Setting up the Tranche 2 flow takes three steps: install your forms (consent, intake and risk assessment) from the template catalog, switch on the flow and choose who may complete assessments, then run a test on yourself. When you are happy, you can share a single reusable public link so clients can verify themselves. IdentityCheck helps you meet obligations; it does not by itself make your firm compliant.
Download the Tranche 2 Quick Start Guide (PDF) for a printable step-by-step version of this setup.
How do I turn on the AML flow?
The Tranche 2 flow runs each customer through a fixed sequence: consent, an intake form, an identity biometric, and a risk-assessment decision by one of your staff. Before you can switch it on, IdentityCheck needs to know which forms drive each step, so you install those first (see the next section).
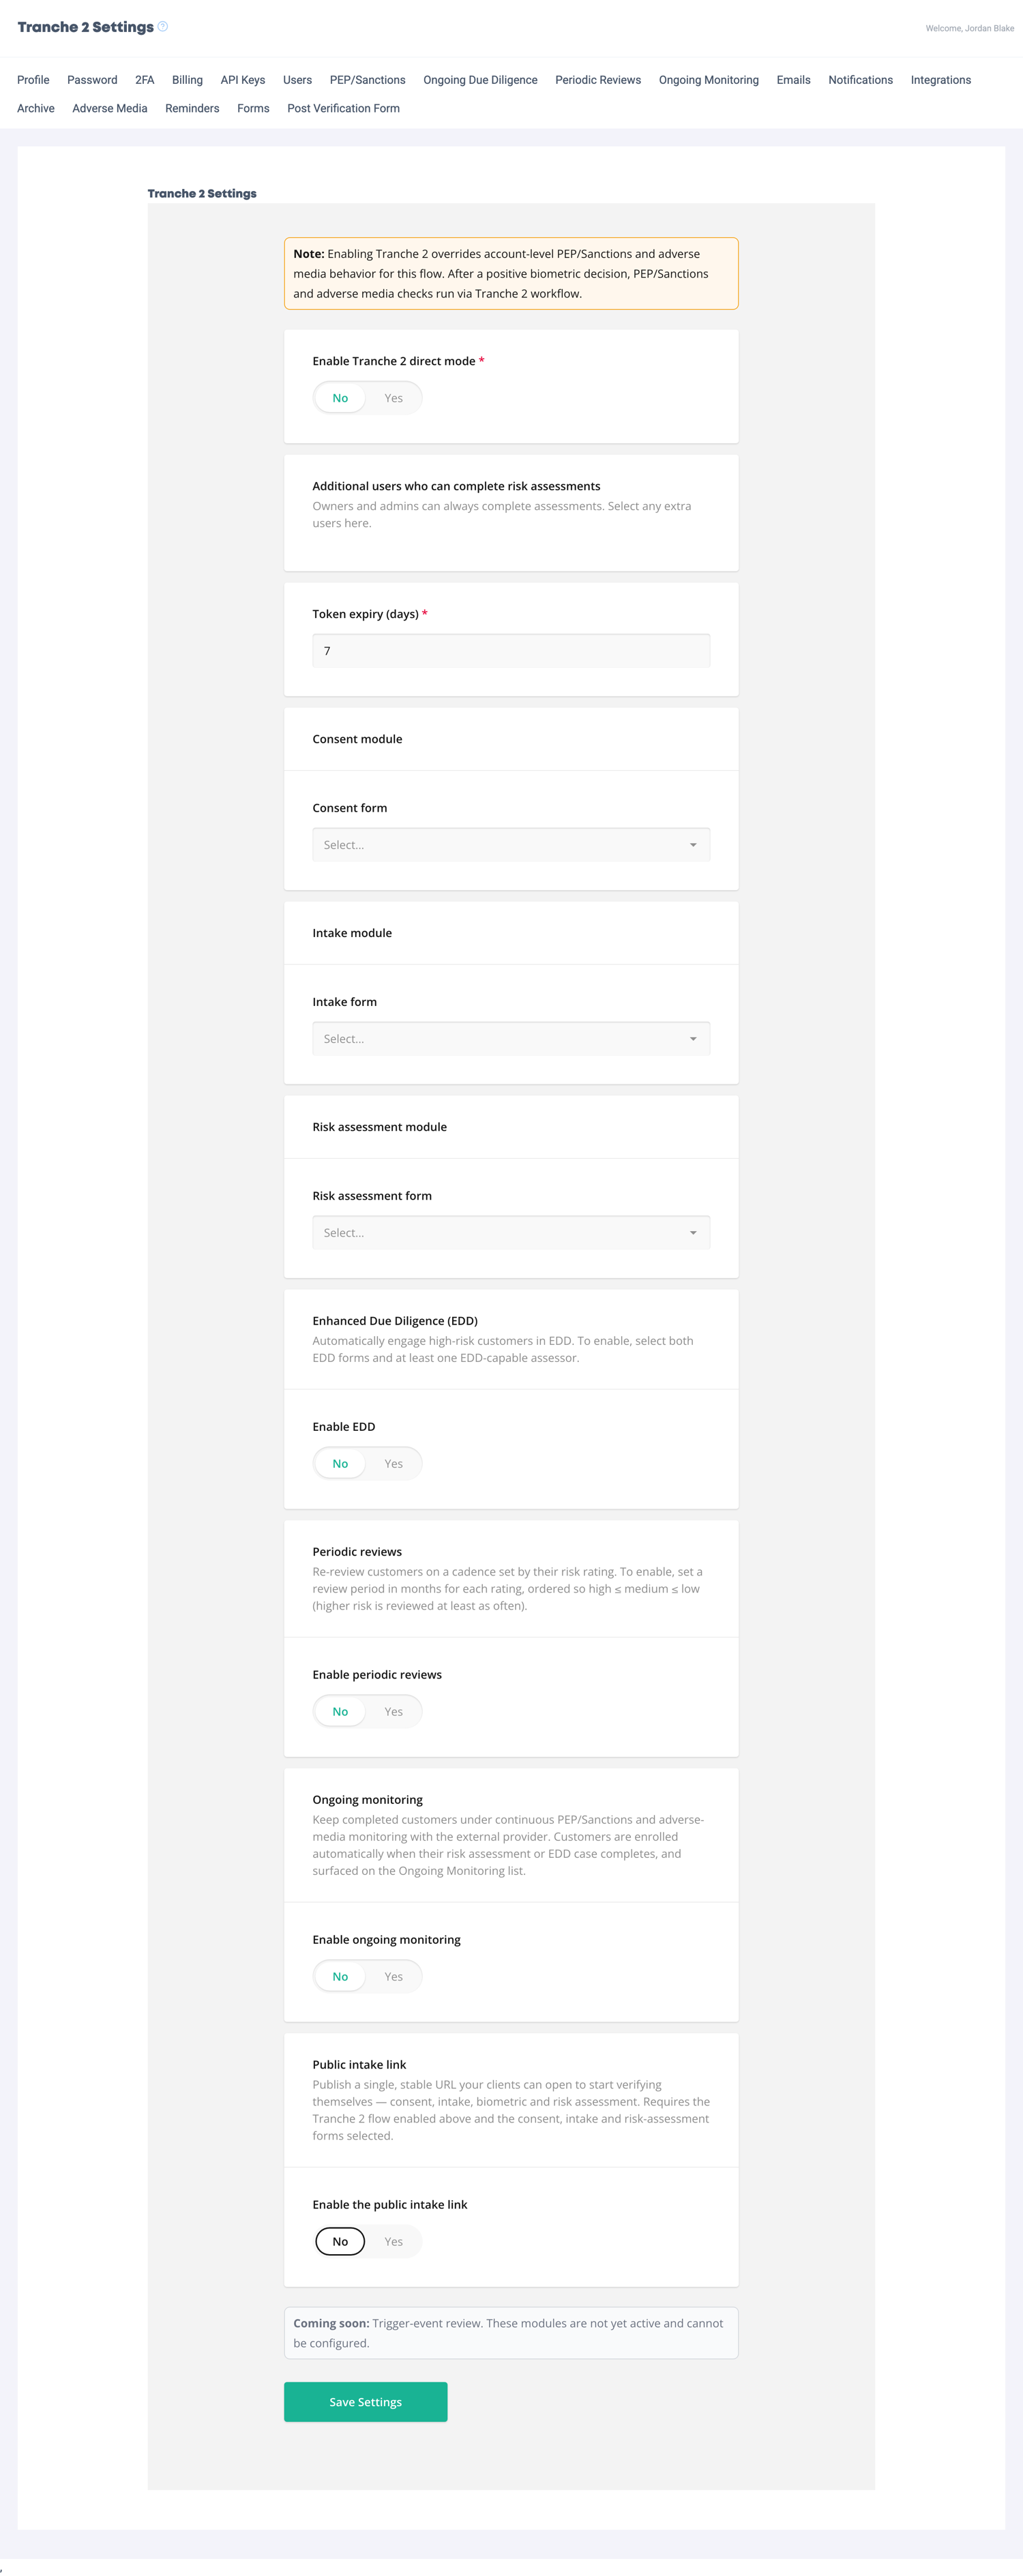
Once the forms are in place, an admin turns the flow on in account settings. Two things to set at the same time:
- Assessors. Choose which staff may open and complete a risk assessment. Account owners and admins can, plus anyone you designate as an assessor. This keeps the final risk decision with the right people.
- Access settings. You can set a PIN requirement for the dashboard and for any review links, so assessments are only completed by the people you intend.
The flow will not enable until a consent form, an intake form and a risk-assessment form are all chosen. That is deliberate: it stops a half-configured flow going live. Once those are set and the flow is on, every Direct Verification you send launches the full consent, intake, biometric and risk-assessment journey instead of a plain identity check.
Which forms do I need?
You need at least three forms, and IdentityCheck gives you ready-made versions so you are not building from scratch.
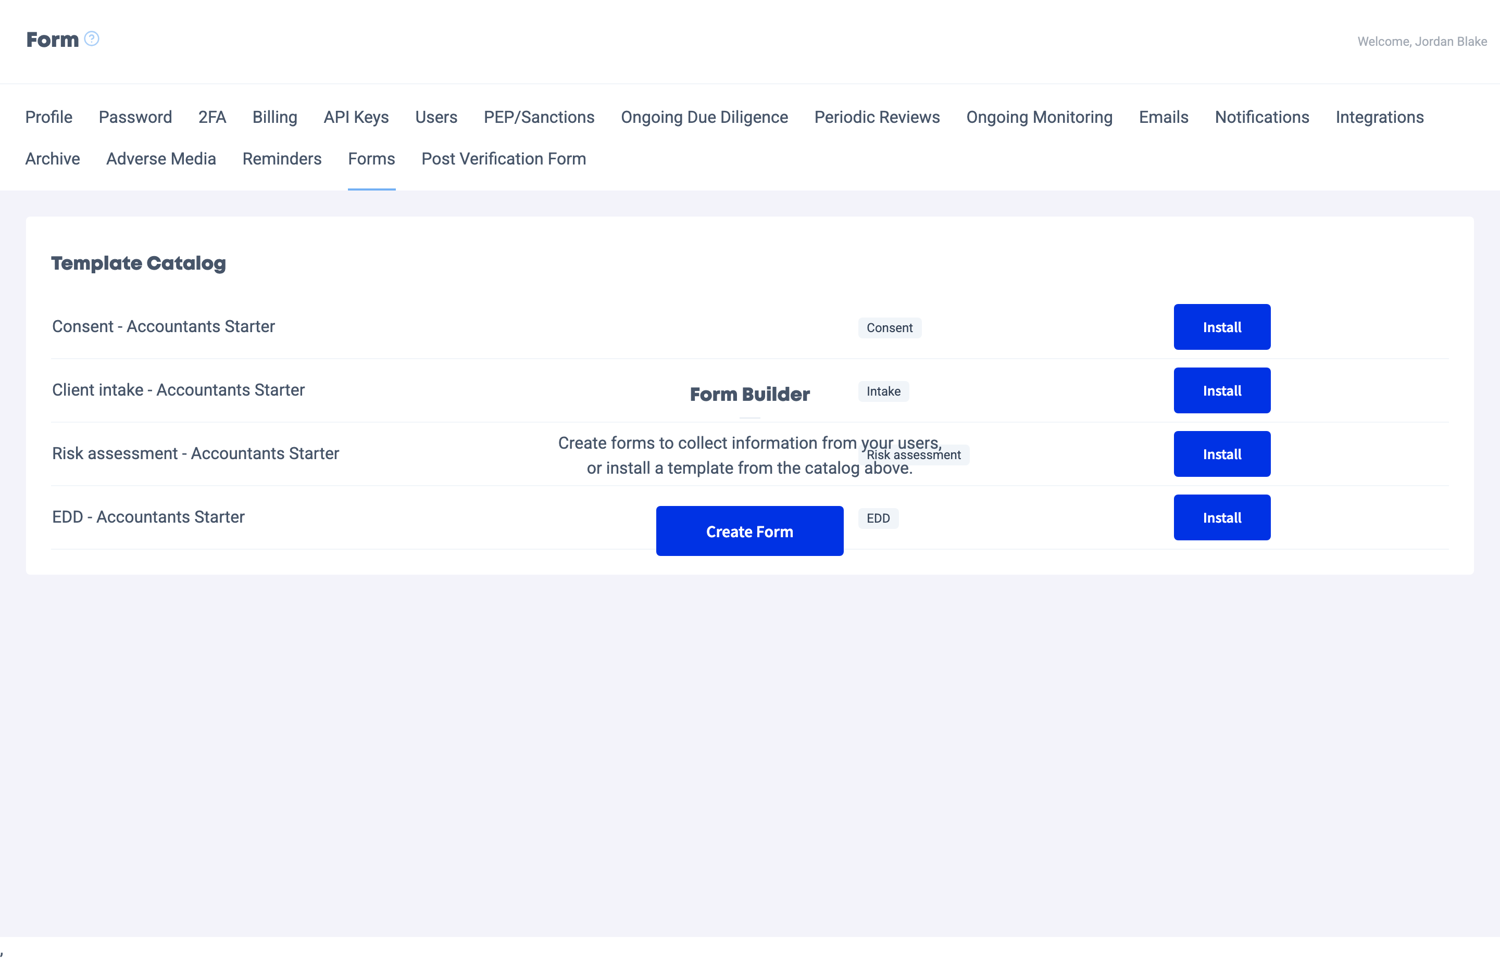
- Open the template catalog. It holds typed starter forms: Consent, Intake, Risk assessment and EDD (Enhanced Due Diligence).
- Install a copy of each form you need with one click. The copy lands in your account and keeps its type.
- Open each installed form in the form builder and edit it to suit your firm. You can add or reword questions, add file-upload questions, and use logic. Australian identifiers such as TFN, ABN, ACN and UTR are checked for valid formats at submission, so typos are caught early.
- For your risk-assessment and EDD forms, choose how the rating is set: Manual, where your reviewer picks the rating, or Calculated, where per-answer points are added up and mapped to a rating by two thresholds you set. Scoring is worked out on the server, so the recorded rating is always the authoritative one.
The consent, intake and risk-assessment forms are the three the flow requires. The EDD starter form is worth installing too; it ships with guidance sections for high-risk customers, covering relevant parties, source of funds and wealth, adverse media, activity comparison, senior approval, controls and record keeping.
How do I run a test?
Before you use the flow with real clients, run it on yourself, the same way you would test a plain verification.
- With the Tranche 2 flow enabled, send yourself a Direct Verification.
- Open the link and complete the journey: give consent, fill in the intake form, complete the identity biometric, and submit.
- As an assessor, open the assessment on your dashboard. You will see the biometric result, any screening results, and the intake answers, then finalise the risk rating.
- Review the completed record. It shows the effective rating, a full scoring summary, the linked form responses, and a time-stamped decision recording who completed it and when. You can save it as a PDF.
Running this once tells you whether your forms ask the right questions and whether your scoring thresholds land where you expect. Adjust the forms and repeat until you are happy.
How do I enable the public intake link?
Once your forms are set, you can let clients verify themselves without a staff member starting each check. An admin switches on a single, stable, reusable public link for your account and sets a daily limit (the default is 25, up to 500). A client opens the link, enters their name and email, and is dropped into your normal Tranche 2 journey: consent, intake, biometric and risk assessment.
A few useful points:
- The link cannot be switched on until your consent, intake and risk-assessment forms are configured, so set those up first.
- If a client leaves partway through, the verification email links back to their in-progress flow so they can return and finish.
- Because the URL is public, it sits behind layered abuse protection, and the daily cap limits how many submissions come through in a day.
- Disabling the link closes it immediately, without affecting any verification already in progress or completed.
Completed public verifications appear on your dashboard tagged so you can tell them apart from staff-initiated checks. From there, review and rating work exactly as they do for any other verification.
Frequently asked
How do I turn on the AML flow? An admin enables the Tranche 2 flow in account settings and designates which staff may complete assessments. The flow will not switch on until you have chosen a consent form, an intake form and a risk-assessment form, so install those from the template catalog first.
Which forms do I need? At a minimum, a consent form, an intake form and a risk-assessment form. You install ready-made versions of each from the template catalog with one click, then edit them in the form builder to suit your firm. An Enhanced Due Diligence starter form is also available for high-risk customers.
How do I enable the public intake link? Once your consent, intake and risk-assessment forms are set, an admin can switch on a single reusable public link and set a daily limit. Clients open the link and verify themselves end to end. Disabling the link closes it immediately without affecting checks already in progress or completed.